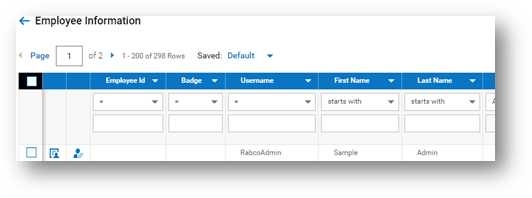
- Navigate to Team > My Team > Employee Information
- Select the Employee you are needing to update
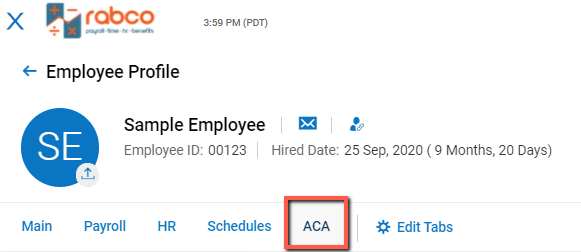
- Navigate to the ACA tab in the applicable employee’s profile
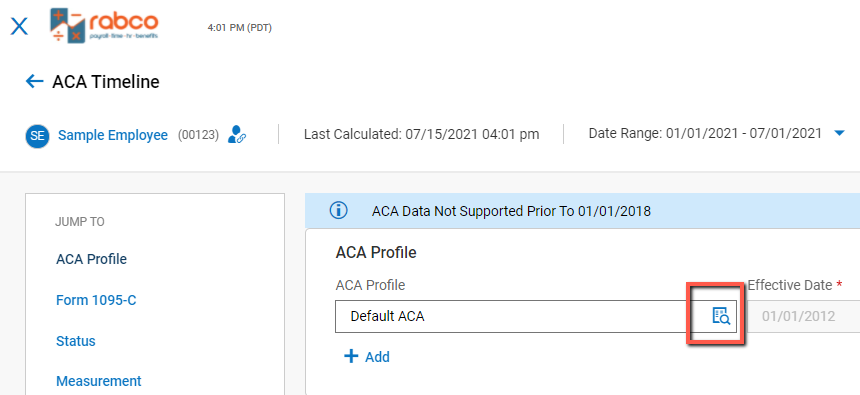
- Locate ACA Timeline
- Select the appropriate “ACA Profile” from the magnifying glass icon menu
- Select
 in the upper right corner
 - If you are needing to adjust the ACA profile due to a status change, select the
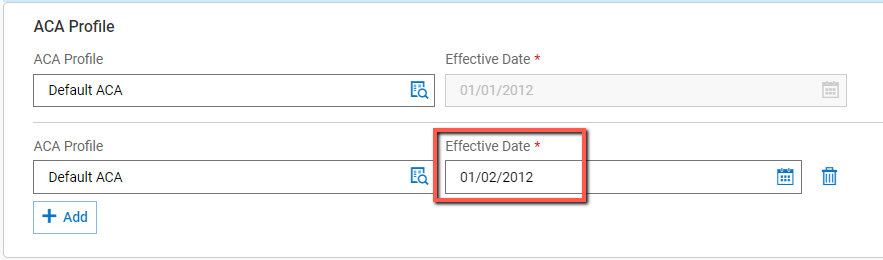
 Add under the current profile and a new line will be created, select the appropriate “Aca Profile” magnifying glass menu, enter the date the status change took place, Click
  in the upper right corner.
Using the Mass Edit option to update employees ACA Profile
- Navigate to the main Menu > Admin > Company Settings> Mass Edit> Mass Edit Profiles
- Select the employees that you would like to assign an ACA Profile to by selecting the checkbox next to the employee’s name or id
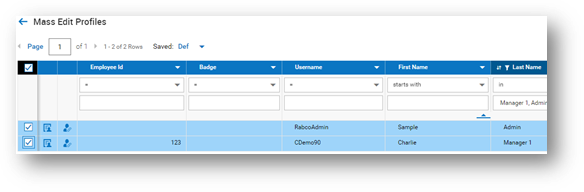
- Use additional columns to filter employees for greater ease of assigning the ACA Profile by clicking on the ellipsis in the upper right hand corner
 and selecting Add/remove columns to filter as needed.
 - Once you have determined the employees you are changing, select Mass Edit in the upper right corner.

- Find the ACA Summary Widget
- If it has not yet been pulled in select


Select the ACA Summary Widget from the Available Windows section and drag it onto the Main tab. - Click

- You will then see the following widget on the Main tab to populate the ACA profile
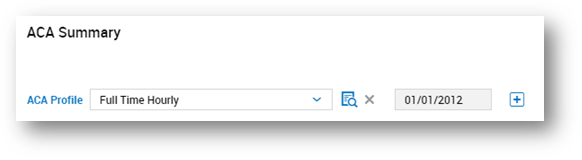
- If you need to populate a second line, use the
 at the end of the date field
- If it has not yet been pulled in select
- From the magnifying glass icon choose the ACA profile you need to assign
- Click
 in the upper right corner
 - A warning message will pop up, select “ok”
