You must assign a benefit profile to any employee who was offered coverage under your company benefit plans at any time during the reporting year. This helps the system determine which ACA code should be generated on Line 14 of your 1095C forms.
Manually assigning the benefit profile to employee
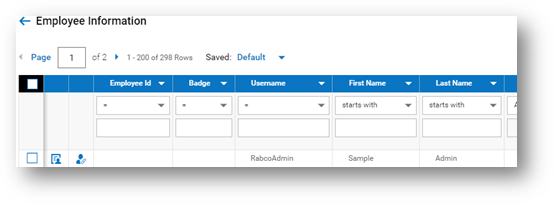
- Navigate to your Main Menu > Team > My Team> Employee Information
- Select the employee who was offered coverage.
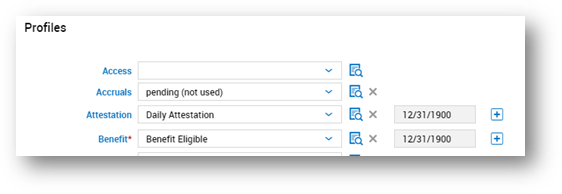
- Locate the “Profiles” section and enter the applicable profile in the “Benefit” field.
- Employees offered coverage for the full year:
- New Employees offered for a part of the year:
- Using the create a second line on the benefit profile
- Leave the bottom line blank
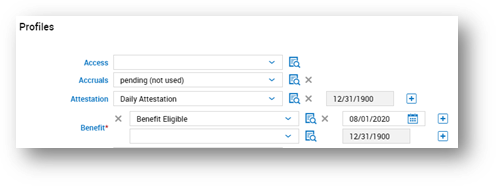
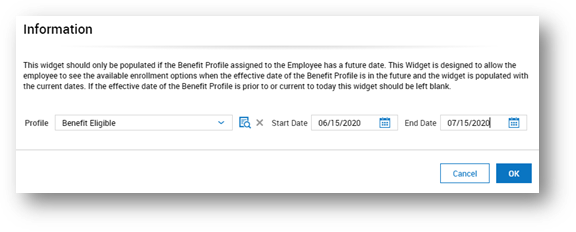
- On the next line, select the benefit profile and enter the date the employee is eligible for benefits. EX: This employee became benefit eligible on 08/01/2020
- Employees offered coverage for the full year:
- Select
 in the upper right corner
 - You will see a Warning at the top of your screen that the benefit profile has been changed, click on that link

***Clients coming on mid-year with RABco that are also tracking ACA within the system will need to do this with employees that were active but have since terminated within this reporting year to ensure that ACA reporting is correct and forms populate correctly at the end of the year.
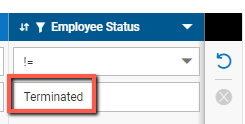
To find terminated employees in the system, you will need to remove the “Terminated” filter from the Employee Status column by deleting the word "Terminated" from the column filter.
Using the Mass Edit option to update employees Benefit Profile
- Navigate to main Menu > Admin > Company Settings > Mass Edit > Mass Edit Profiles
- Select all employees who you intend to assign the “Benefit” profile to via the check box to the left of the employee’s name or id number.

- Terminated employees will not show in the default view. To view terminated employees, remove the terminated filter from the applicable column as shown above.
- You can use filtering to help select the correct employees, if applicable, by using the ellipsis
 option in the upper right corner and select Add/Remove columns.
- Once you have selected all applicable employees, select Mass Edit in the upper right corner.
- In the profiles section, select the applicable benefit profile. If you are mass editing employees who have not been eligible for the entire year, you will want to refer back to page 2 “New Employees offered for a part of the year:” section as how to create a second line with accurate benefit eligible date.
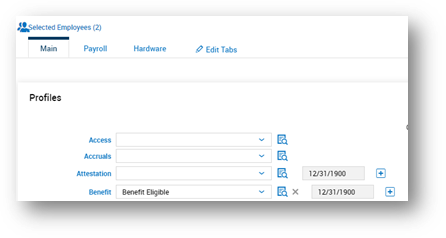
- In the profiles section, select the applicable benefit profile. If you are mass editing employees who have not been eligible for the entire year, you will want to refer back to page 2 “New Employees offered for a part of the year:” section as how to create a second line with accurate benefit eligible date.
- Select
 in the upper right corner.
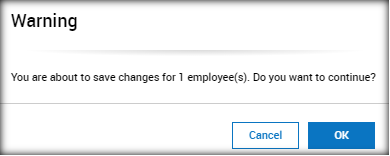
 - On the following warning box, select “Ok”
