Step by step guide on how to add an employee in Kronos Workforce Ready (WFR) including schedules profile information
Navigate to the Hamburger Icon in the top left.

Select the Employee Information option located under My Team.

Choose the “Hire” button located at the top right of the screen.

Make sure to enter all required fields. First Name and Last Name are mandatory when adding an employee. Select Continue in the bottom right to continue to the next tab.

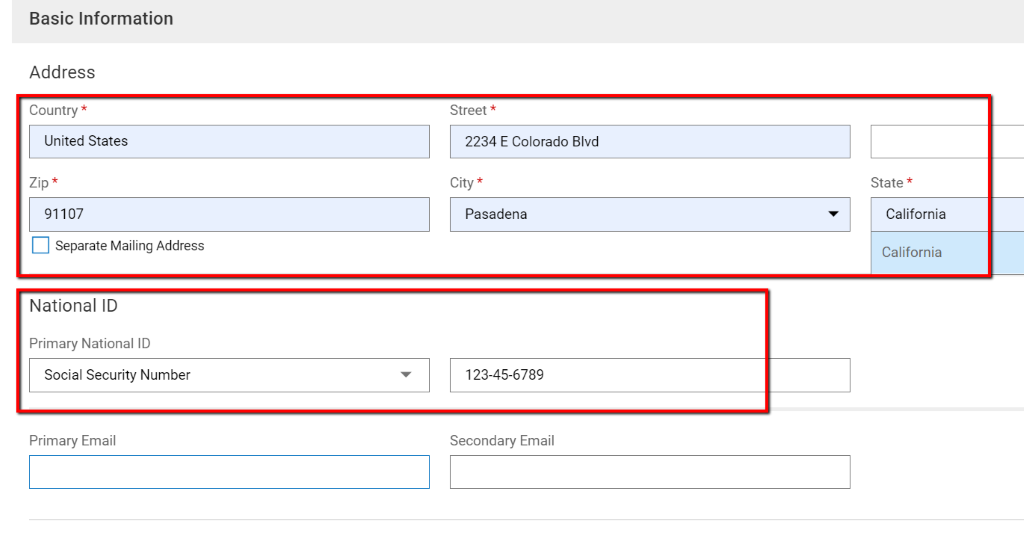
Make sure to enter the full employee address. You must enter a valid Social Security Number for each employee. This number cannot begin with a “9”. Select continue to advance to the next screen.
Add the employee hourly rate by selecting the “...” to the right.

The following window will appear. Make sure to enter an Amount and # of pay periods in a year. For a weekly company this number will be 52. Once you have made all necessary updates click “SAVE”.

Select Continue to advance to the next page.

TAX SETUP (Only necessary if you are not having employee's submit withholding forms through the system) (See KB Article "How do I approve an employee's withholding request?")
First you will update the employee’s “Federal” tax information based on their W4. You will do this by selecting the “...” to the right of the entry in the table. 
The following prompt will appear. From here you can update the Filing Status and # of allowances and select “Save” to continue.
The answer to the Form 2020 W4 box will unlock the appropriate areas (choose either "Yes" or "No")

Next choose the “State” option and update the employee’s withholdings for the state as well. If they did not provide you with separate withholding information for the state enter the same as the federal. You can accomplish this by selecting the “...” to the right of the entry in the table.

The following box will appear. At minimum update the # of Allowances and the filing status as shown below. Click “Save”.

Select “Continue” to move to the next screen.

Fill in the required fields on this page and click continue.

On the last tab you will select “Add Employee”. Once you have successfully added the employee you will be left at that employee’s information screen.
ADD INFORMATION FOR SCHEDULING AN EMPLOYEE (ONLY REQUIRED IF YOU USE THE ADVANCED SCHEDULER)
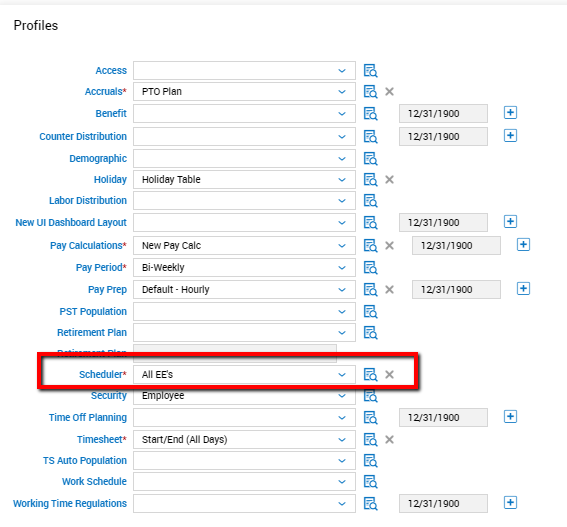
Make sure the employee has the “Scheduler Profile” Assigned. This should be set by default.
Navigate to the “Schedules” tab at the top of the employee profile and click “Add Jobs” under Scheduled Cost Centers.

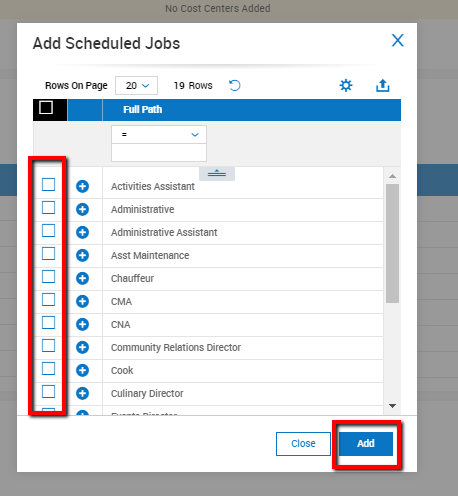
Check the box next to any job/position this employee would need to be able to be scheduled for and select “Add” at the bottom of the box.
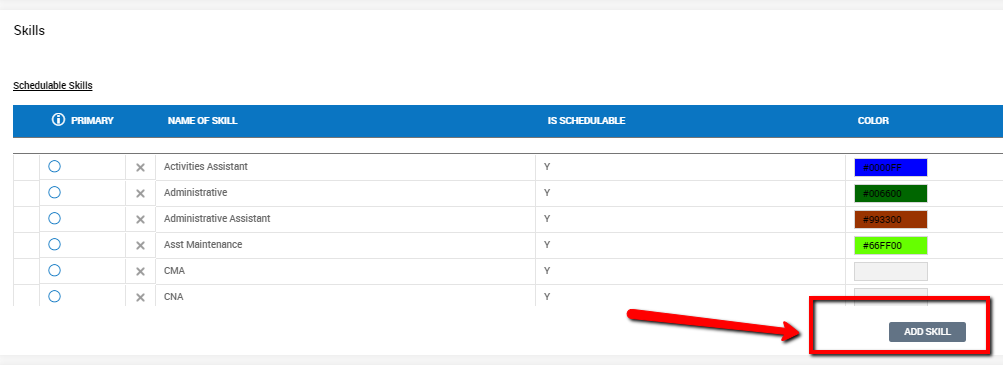
Next navigate to the widget titled “Skills” to add the necessary skills to an employee to be scheduled. Click “Add Skill” to choose available skills. (This will be the same as the scheduled cost centers selected previously.)
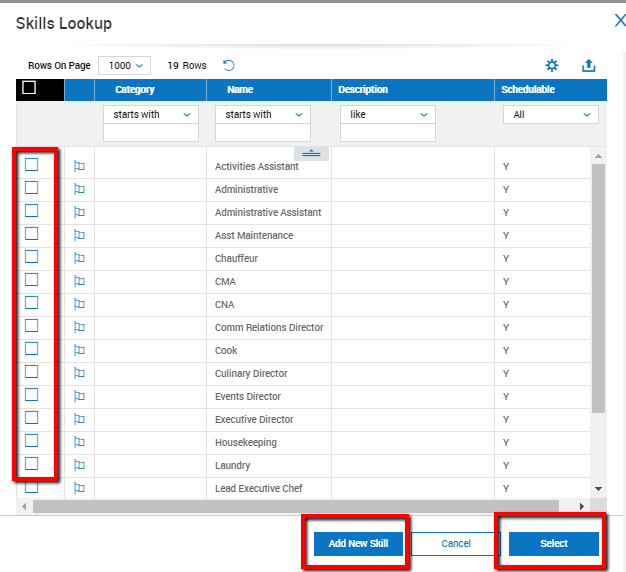
Check the box next to the “Skills” you wish to add to this employee. Once you have selected all of the “Skills” click the “Select” button on the bottom right of the window.
***If a skill is not in the list you can add it by selecting “Add New Skill” ***
If the employee is not a manager for any schedules then they are fully setup!
If they are a manager see the knowledge base article for "How do I give a manager access to a schedule?"
