a. Navigate to Main Menu > Admin > Company Settings > HR Setup > Asset (Property) > Asset Types
b. Here is where you will enter the list of asset types you want to track (i.e. Computer, Cell phone, Uniform, Fob/Badge)
c. Click on 
d. Fill out the type: 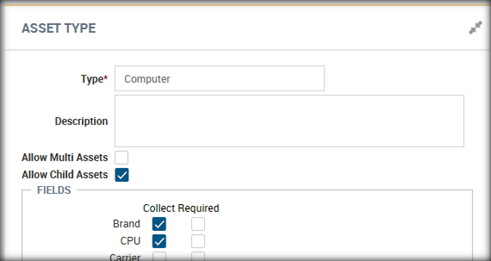
e. Under “Field” check off the items that you will want to collect and/or require on that type of asset.
f. Click on 
g. Click on the back arrow to go back to the Asset Types list.
h. Continue to add until all asset types are entered.
Entering Assets (Property):
a. Navigate to Main Menu > Admin > Company Settings > HR Setup > Asset (Property) > Assets (Property)
b. Here is where you will enter the list of specific assets (i.e. computer numbers, cell phone number, etc. that will be assigned to the employees).
c. Click on 
d. A pop-up will appear, you must select the correct asset type: 
e. Click on 
f. This will bring up a new screen to enter a specific asset for that type.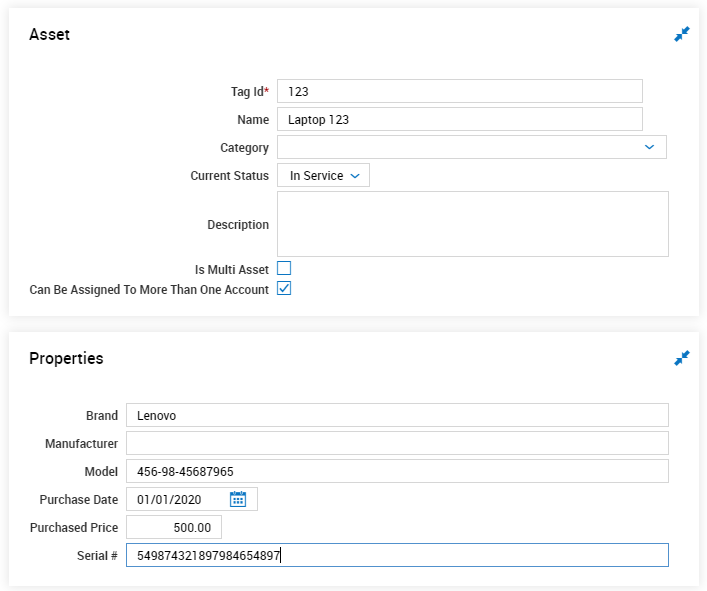
g. If you check the box for “Can Be Assigned to More Than One Account” this will allow the asset to be assigned to multiple employees at once.
h. Click on .
i. Click on the back arrow to go back to the Assets (Property) list.
j. Repeat until all assets are entered. You do have the option to clone and edit the clones of the assets as well to aid in faster setup

Assigning Assets to Employees:
a. Go To: Main Menu > Team> My Team> Employee Information
b. Select the appropriate employee
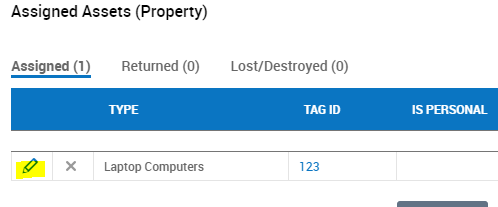
c. On the HR tab, there is an “Assigned Assets (Property)” section: 
d. Click on 
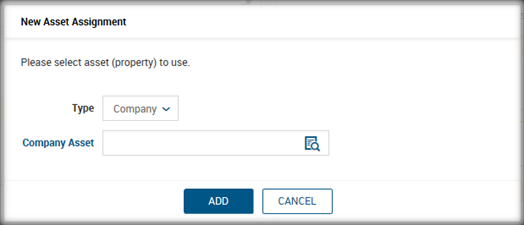
e. Click on the icon for Company Asset. This will bring up a complete list of all company assets, search and select the correct asset by clicking on the
 icon.
icon.
f. Click on to apply this asset to this employee.
g. Once added to the employee, you can enter additional information: 
h. Notes can be added and documents can be uploaded to the asset assignment as well using the below icons found in the top right corner of your screen when viewing the assigned asset

****NOTE: assets can also be assigned to employees directly from the asset screen when entered into the company if known at that time.
Assigning Assets as Lost/Destroyed:
a. Go To: Main Menu > Team> My Team> Employee Information
b. Select the appropriate employee
c. On the HR tab there is an “Assigned Assets (Property)” section:
d. Select the correct asset by clicking on the edit icon for that asset
e. Click on MARK AS LOST/DESTROYED button in upper right corner of your screen
f. Enter in the date, comments, and status: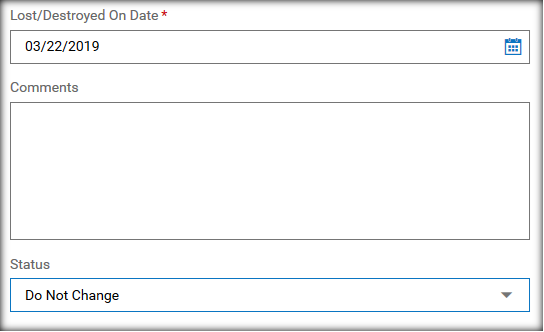
g. Click on RETURN
h. The asset will move from “Assigned” to “Lost/Destroyed” on the widget: 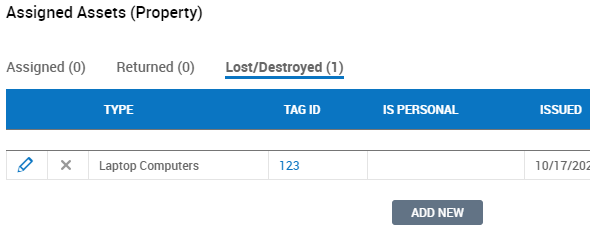
Assigning Assets as Returned:
a. Select the appropriate employee
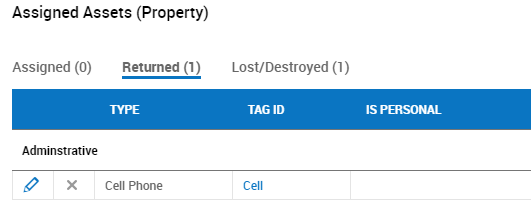
b. On the HR tab there is an “Assigned Assets (Property)” section:
c. Select the correct asset by clicking on the edit icon.
d. Click on RETURN ASSET button in upper right corner of your screen
e. Enter in the date, comments, and status: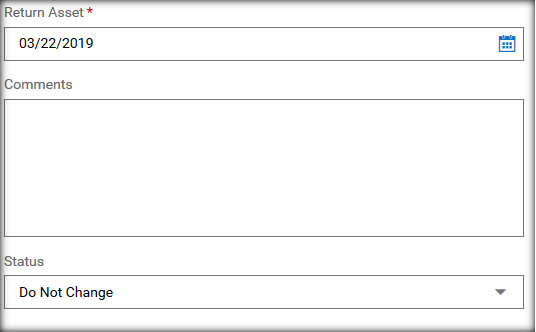
f. Click on RETURN
g. The asset will move from “Assigned” to “Returned” on the widget:
Changing an Asset Status from Lost:
a. If an asset needs to be retired from use, navigate to Main Menu > Admin > Company Settings > HR Setup > Asset (Property) > Assets (Property)
b. Select the correct asset by clicking on the view asset icon
d. Change the Current Status to accurate state
